DesertStorm Lighthouse POI Deep Dive
Deep dive on the DesertStorm [EXTRACTION] lighthouse POI: elevated vision, sniper duel risk, supply drop spotting, extract pairing, solo vs squad tactics, and squad callouts.
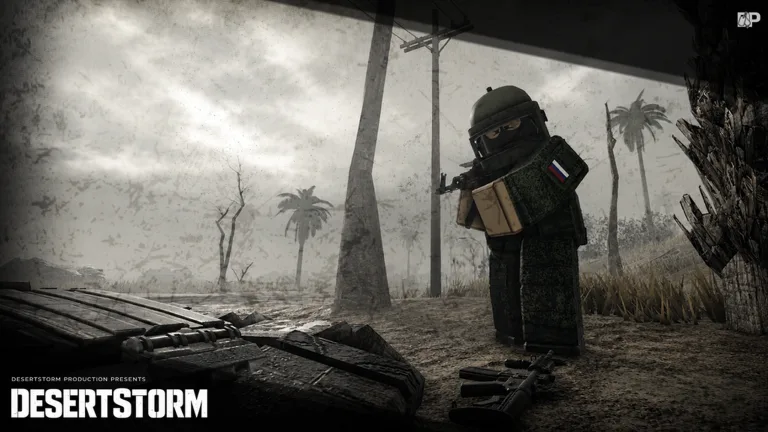
The lighthouse is one of the most recognizable landmarks on the Desertstorm Extraction main map. Perched on elevated cliff terrain, it offers unmatched sightlines across desert valleys, industrial spurs, and rotating supply drop smoke. Squads call it simply “light” or “tower” on comms — and every experienced player knows the name implies both opportunity and exposure.
This guide is a dedicated deep dive into lighthouse POI tactics: how to use vision without becoming a sniper magnet, when to pair the area with nearby extraction points, and how solo runners differ from full squads. For broader POI context, start with the map hub and POI locations overview.
Why the lighthouse matters
Unlike enclosed compounds, the lighthouse rewards information over loot density. Peripheral crates and occasional weapon spawns exist, but the real value is map control:
- Spot supply drop landing zones before ground teams arrive.
- Track player rotates between military base and prison routes.
- Call squad pushes with compass bearings via K comms.
- Deny enemy overwatch before your team commits to a high-tier POI.
Treat lighthouse visits as recon missions, not loot marathons. Players who anchor entire raids here often die with mediocre gear because they traded time and exposure for sightlines they never acted on.
Vision and sightlines
The lighthouse ring sits above most POI rooftops. From the upper platform and cliff edges you can observe:
- North-south highway traffic — early warning for third-party squads rotating to prison.
- Open desert flats — supply drop crates visible by smoke column and parachute silhouette.
- Industrial yard edges — solo looters crossing kill zones with minimal cover.
Bring binoculars-equivalent behavior: scan, call, move. Holding ADS on one lane for three minutes paints a target on your forehead. DM rifles and designated marksman builds from the weapons tier list excel here — SMGs do not.
Sniper risk profile
The lighthouse is a sniper duel magnet. Strengths become liabilities when another player holds the same elevation or counters from a farther ridgeline:
| Factor | Risk level | Mitigation |
|---|---|---|
| Open platform | High | Peek-shoot-reposition; never re-peek same window |
| Cliff ring | High | Use rocks as slice angles; avoid skyline silhouettes |
| Sound carry | Medium | Crouch-walk on metal grates; suppressor if affordable |
| Third-party timing | High | Assume every shot draws a flank within 90 seconds |
| Extract delay | High | Pre-plan exit before engaging |
If you hear a bolt-action cycle from another tower angle, disengage. Winning a sniper trade at lighthouse while your backpack holds tier-two loot is a negative expected value play.
Supply drop spotting
Community raid footage consistently shows lighthouse players first-spotting supply drops across the map. Optimal workflow:
- Rotate to lighthouse early raid when drop timer appears on HUD.
- Identify landing zone and call compass + landmark via squad comms.
- Decide: push drop with team or deny enemy push from high ground.
- If pushing, descend before the crate lands — height advantage matters less in CQC around the crate.
Read full drop tactics on the supply drops guide. Lighthouse spotters who never leave the tower often watch their squad wipe below while they hold an empty sniper rifle.
Extract pairing
Lighthouse sits mid-map on many alpha layouts, which complicates extraction. Pair it deliberately with exits documented in extraction points:
- Before ascending — Mark your intended extract on the map. Climbing without an exit plan traps you on the ring.
- Nearest-extract routing — Often the closest icon is not the safest. Route through dead ground, not open desert.
- 30-second channel discipline — Same rules as how to extract: leaving the zone resets progress.
- Split extracts — Squads should not four-stack one extract after lighthouse fights; you become one grenade away from a full wipe.
Solo players: snapshot the tower, loot one peripheral crate maximum, descend toward extract within five minutes. Long lighthouse stays end in death or missed extract windows.
Solo vs squad tactics
Solo lighthouse play suits experienced runners who treat the POI as a transit node:
- Up, scan 30 seconds, call mental notes, down.
- Avoid bolt-action weapons unless you plan immediate disengage.
- Run PvP survival fundamentals — assume every angle is watched.
Squad lighthouse play enables overwatch roles:
- One designated sniper/overwatch, two looters on flanks, one flex for extract callouts.
- Hold grenades for pushers on the stairwell and ramp paths.
- Time-box to 6–8 minutes total POI commitment including ascent and descent.
Never send the entire squad up the narrow stairwell simultaneously — one grenade clears the push. Spread entry, clear platform corners, then assign sectors.
Callouts and comms
Standardize squad callouts to reduce confusion:
- “Light occupied” — Enemy presence on tower; do not push stairs blind.
- “Light clear, overwatch up” — Friendly holding vision; safe to rotate below.
- “Drop north of light, 240” — Supply drop bearing from lighthouse reference.
- “Extract south, descending” — Team leaving elevation; do not stay behind.
Use compass headings from K menu consistently. Mixing “left of tower” and compass degrees in the same squad causes friendly fire incidents on the cliff ring.
Loot expectations
Lighthouse loot is medium tier at best — peripheral weapon crates, meds, occasional attachments. God-tier rewards live at prison and boss-adjacent zones, not here. Visit for vision; loot only what fits your extract timeline.
When NOT to go
Skip lighthouse this raid if:
- You are on a timed trader task far from mid-map.
- Your kit is budget-tier and you cannot win sniper duels.
- Extract timer is under ten minutes and you are not adjacent.
- Enemy squad was spotted rotating toward the tower before you arrived.
Video tour
Community overview showing lighthouse positioning, extract HUD, and raid flow across the main map:
Related guides
- Map hub — all Roblox places and queue methods
- POI locations — lighthouse in context with prison and military base
- Extraction points — timed extracts near mid-map
- Supply drops — dynamic POIs lighthouse spotters call
- PvP survival — disengage and rotate fundamentals
- Weapons tier list — DM rifles for overwatch roles
The lighthouse rewards discipline. Scan, call, extract — and the desert becomes readable instead of chaotic.
Frequently Asked Questions
Quick answers to the most common questions.
Is the lighthouse good for loot?
Peripheral crates offer medium-tier gear at best. Main value is vision for [supply drops](/guides/supply-drops/) and player rotates, not god-tier loot.
Should solo players hold the lighthouse?
Only briefly. Snapshot sightlines, avoid sniper duels, and descend within minutes toward a mapped [extract](/map/extraction-points/). Long holds end in third-party wipes.
What weapons work best at lighthouse?
DM rifles and designated marksman builds from the [weapons tier list](/tier-list/weapons/). SMGs and shotguns fail at range unless you descend immediately.
How do I call supply drops from lighthouse?
Use compass bearing plus landmark: "Drop north of light, 240." Full push tactics are on the [supply drops guide](/guides/supply-drops/).
Which extract pairs with lighthouse?
Depends on alpha layout — always pre-mark an exit in [extraction points](/map/extraction-points/) before climbing. Nearest icon is not always safest.